
Divine Awakening: Let's Make a Sprite
16/03/2021
Creating game sprites from scratch can be time consuming and difficult, especially compared to the ease of sketching a design on paper. The process I use to create sprites for Divine Awakening takes advantage of sketching to cut out a lot of hard work from spriting. I've broken down this process for the last sprite I made. Before beginning, I should note that I haven't got a way to distinguish the word "colours", referring to an exact rgba combination, from "colours" referring to 'red', 'blue', 'green' etc. in their many tones, so for the purpose of this explanation, a specific combination of rbga values will be marked as "colours*".
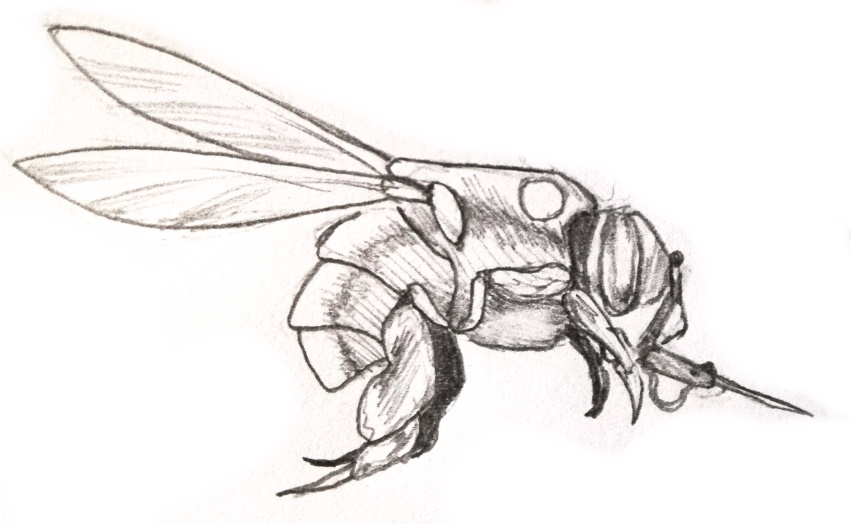
The first step is to design the enemy. Generally the drawings don't have to be very large, in fact it's preferable to draw then small, to limit how much detail I can put in at an early stage. The outlines need to be strong, and a little light shading will help colour in the sprite later. The drawing is then scanned or photographed, and cleaned up with a contrast filter.
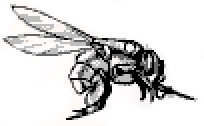
Using a "threshold" filter to make pure black and white images, then converting them to different shades of grey and stacking them on top of each other, an image resembling a finished sprite can be made. The drawback is that this will take a lot of manual editing of all colours at once, in order to look good. I would use this method for a very large sprite but not for a small enemy such as this. I did use the above image as reference whilst tracing.
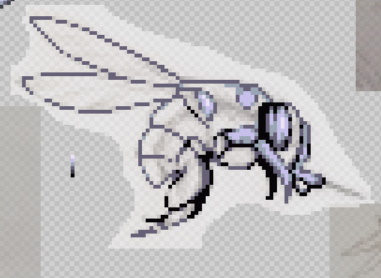
The next part of the process is to trace over a resized copy of the scanned drawing. The colours* from the original drawing have to be approximated to those on a pallete. It's easiest to start with the outline or strong shadows, and then work towards lighter colours*. Sometimes extra bright highlights are needed, if the drawing doesn't have a high enough range of values.
The image above shows the result of tracing. At this stage everything is the same colour, and some of the (manual) antialising might make the outline look ugly. An issue at this stage is distinguishing between lighter and darker areas of different colours, such as a bright yellow part beside a dark brown part. Using the same grey palette means that I don't have a high enough range of values to make these separate parts stand out.
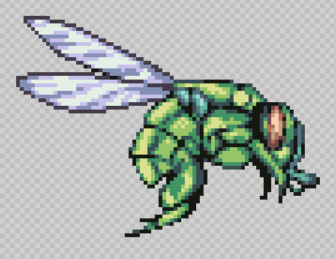
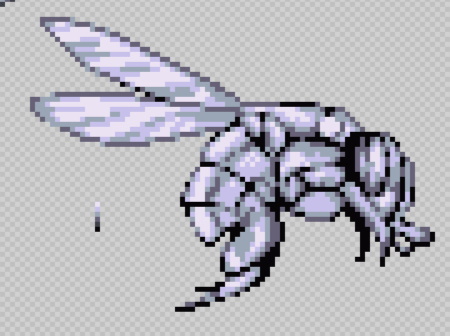
This is the most entertaining stage in the process. Using a colour* palette, I fill in the different parts of the enemy using a select and bucket tool. Here I borrowed the wing colours* from an enemy that is already in the game, and recycled some greens from the tilemap's palette. To try and maintain an old fashioned look for my sprites, I try and limit the total colours* in a sprite to 16, which means I can have 4 tones of 4 colours. Using 4 tones is most comfortable for a sprite, and often the darkest and lightest tones of a colour can be used for extending the range of values in another.
The final sprite is animated, by erasing unnecessary parts of the image, and by moving parts. Usually I find 4 frames is enough for a simple animation. When enemies fly around in the game it's difficult to notice a complex animation anyway.
So that's the whole of the Divine Awakening sprite making process. I hope you can find a use for this for your own projects. Oh and I nearly forgot, the design itself is more of less created by nature, check out "Orchid" bees, they are really cool.